
Engineering
Supercharge Your Frontend with Lovable AI
Aman Mundra · February 6, 2026 · 9 min read

Contents
Table of contents
1. Introduction
2. Challenges Beginner React Developers Face
3. What is Lovable AI?
4. Why Lovable AI is a Game-Changer for Frontend Development
5. Key Ways Lovable AI Helps Beginners
 * Simplifying UI Design
 * Providing Ready-to-Use Components
 * Speeding Up Development
 * Enhancing Collaboration
6. Building Your First Project With Lovable
7. Connecting to Supabase
 * Adding user authentication
 * Publishing the app
 * Connecting to GitHub
8. Best Practices When Using AI Tools as a Beginner
9. Conclusion
In this article, we’ll guide you step by step to build your very first React project using Lovable AI, connect it to Supabase, and publish it online. By the end, you’ll see just how much time and effort AI can save you.
Introduction
Lovable is a text-to-app tool that helps anyone make real apps without knowing how to code. You just type your app idea in a chat, and the platform turns it into a working app.
In this guide, I’ll show you how to use Lovable by making something useful. I’ll walk you step by step to build and publish a simple to-do list web app that saves data, lets users sign in, sends email reminders, and supports paid plans.
1. Tech Stack
- Frontend: React (with Lovable AI integration)
- Backend / Database: Supabase
- Hosting / Deployment: Vercel or Netlify
- Version Control: Git & GitHub
2. APIs
- Supabase Auth API: For user authentication
- Supabase Database API: To store and retrieve data
- Any 3rd-party API your project may need: Depending on your need
Challenges Beginner React Developers Face
- Struggling with UI/UX design principles.
- Spending too much time on CSS styling.
- Difficulty creating responsive layouts that look good across devices.
- Not knowing where to start when it comes to component organization.
- Lack of confidence in making the frontend feel professional and modern.
What is Lovable AI?
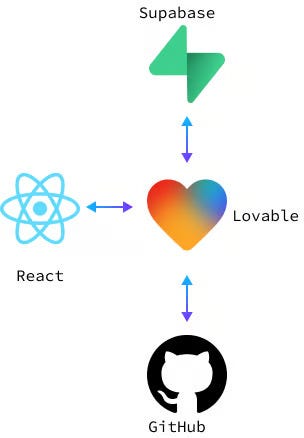
Lovable uses AI to turn our ideas into real apps just by describing them. This way, we don’t need to deal with the hard parts of coding, so anyone can make apps easily. It also helps developers who want a quick way to test or build their app ideas.
Lovable uses React and Vite for the frontend. React is a popular JavaScript library for building user interfaces, known for its flexibility and efficiency. Vite, on the other hand, is a build tool that offers a faster and leaner development experience. These frameworks facilitate our app creation by handling complex UI logic, ensuring that our applications are not only functional but also responsive and smooth.
For the backend, Lovable uses Supabase, an open-source alternative to traditional backend solutions. Supabase is essentially a collection of tools that create a backend system, including database storage, authentication, and cloud functions. It works in conjunction with our app to manage data and enable real-time functionality.
Lovable doesn’t allow us to edit the code it produces directly in its interface. However, we do have the ability to link our app’s code to a GitHub repository. This connection means any changes made to the code on GitHub are directly reflected in the app, allowing for collaborative development and version control.
Why Lovable AI is a Game-Changer for Frontend Development
Traditional frontend development can be slow for beginners, but Lovable AI makes it easier by:
- Offering ready-made templates aligned with best practices.
- Suggesting improvements in UI design.
- Automating repetitive tasks like styling and layout adjustments.
- Reducing trial-and-error, giving beginners more confidence to experiment.
Key Ways Lovable AI Helps Beginners
a) Simplifying UI Design
Lovable AI provides design recommendations and pre-styled elements, helping beginners avoid design mistakes and focus on learning React fundamentals.
b) Providing Ready-to-Use Components
Instead of writing everything from scratch, developers can pick from AI-suggested React components that follow modern UI trends.
c) Speeding Up Development
With automated suggestions and instant feedback, developers spend less time debugging UI issues and more time improving their apps.
d) Enhancing Collaboration
Lovable AI integrates well with team workflows, making it easier for beginners to collaborate with more experienced developers.
Building Your First Project With Lovable
To start using Lovable, just go to their website and sign up for a free account.
We will give a brief description of our project.
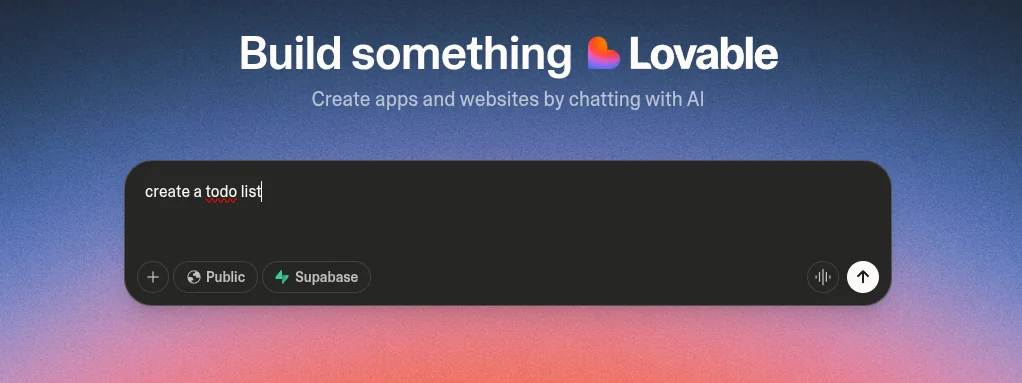
My description here is short on purpose. I also tried writing a long, detailed description with all the features, but that didn’t work well because most of those features need a backend. When the project is first created, it isn’t linked to Supabase automatically, so the prompt won’t work.
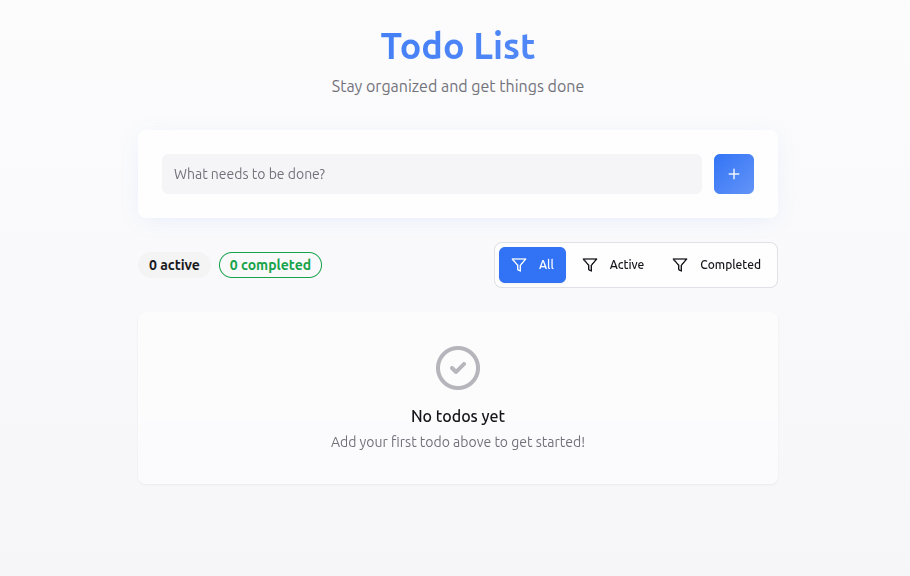
At this point, the app was working well. I could add, delete, and mark items as done in the to-do list. To my surprise, the data stayed even after refreshing the app!
Lovable made this work using local storage, which saves data in the browser itself. The good part is it works without the internet, but the downside is you can’t see the same data on different devices.
Next, let’s replace this with a backend database by connecting our project to Supabase.
Connecting to Supabase
Supabase is an open-source platform that gives our apps a ready-made backend. It provides services like database storage, user login, and APIs, making it a complete tool for handling app data.
For example, in a to-do list app, Supabase is needed if we want the data to stay the same across many devices and users. Unlike local storage, which keeps data only on one browser, Supabase stores data in the cloud. This lets users see their to-do lists on any device and get updates right away.
Supabase also handles user sign-ups and logins, keeping each person’s data safe and private. By linking our app to Supabase, we unlock its full power.
Another benefit of Supabase is that it’s open-source. This means we’re not forced to use one cloud provider and can choose where to host our backend. We can use Supabase’s own hosted service for convenience, or self-host with Docker if we want more control. This gives us flexibility to pick what works best - whether it’s saving money, getting better performance, or meeting special rules.
To connect our project to Supabase, we follow these steps:
- Click on the Supabase button on the top-right corner.
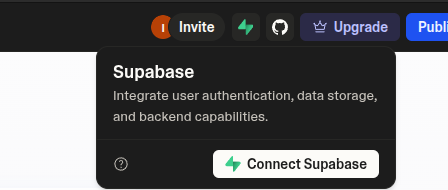
- A pop-up will appear, prompting us to sign up for Supabase.
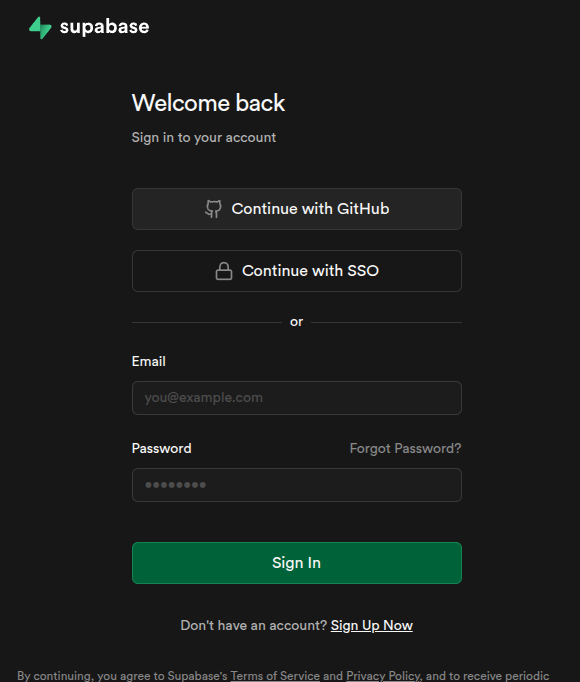
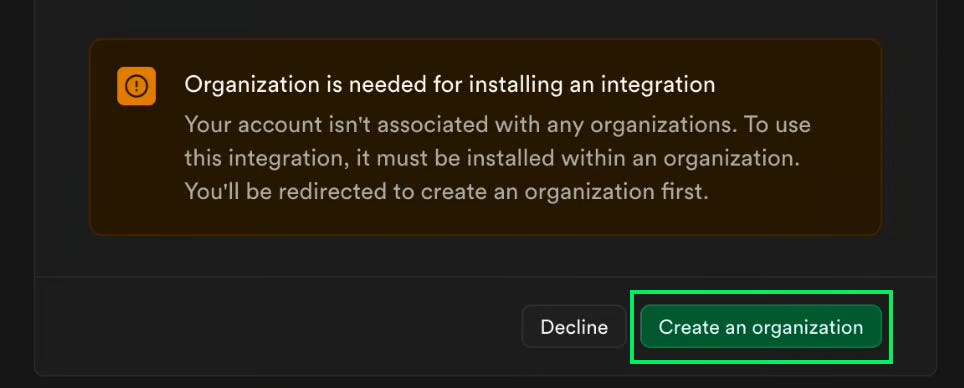
- After signing up, we click the Supabase button again to authorize Lovable to access our account. We’ll be prompted to create an organization.
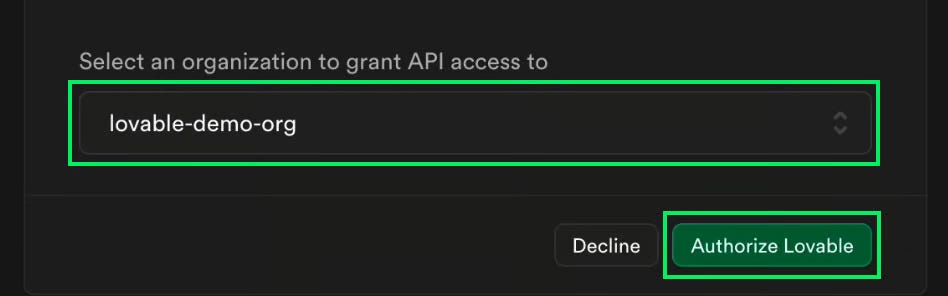
- Once the organization is created, we can select it and authorize Lovable to access our Supabase account through that organization.
- Click the Supabase button again and create a project. This will redirect us to the Supabase website, where we can configure the project.
- Finally, return to the Lovable website and click the Supabase button one last time. Then, select the project we just created. This will prompt the AI to update the code to connect to that project.
That’s it, now our app has a backend!
As mentioned above, it’s better to connect to the project Supabase before asking Lovable to implement any functionality that requires a backend because it seems like it doesn’t like to write the code before it’s connected. Note that this is not really how engineers work, frontend engineers can write the frontend code without the backend being implemented.
Adding user authentication
With our app connected to a Supabase project, we can now prompt Lovable to add user authentication.
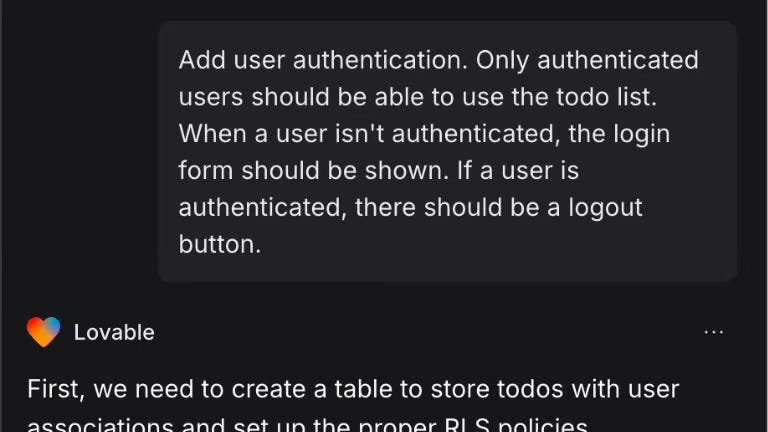
First, the AI will create the database tables for our application. Once it’s done, we need to manually approve it by clicking the “Apply Changes” button on the chat window.
We won’t always be prompted to accept the AI’s changes, but in some cases, this is necessary because some changes (like database updates) can affect the app in production even without publishing it.
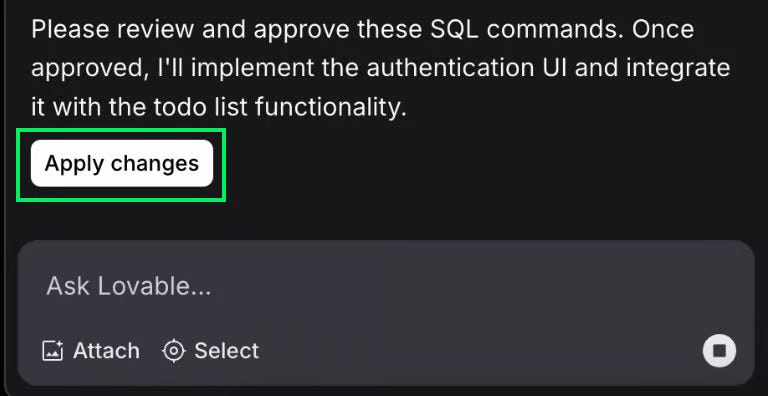
After the database is updated, it will start updating the code to authenticate users and save the to-do updates to the database.
Now, Build completed successfully.
Publishing the app
To publish the app, we can use the “Publish” button in the top-right corner.
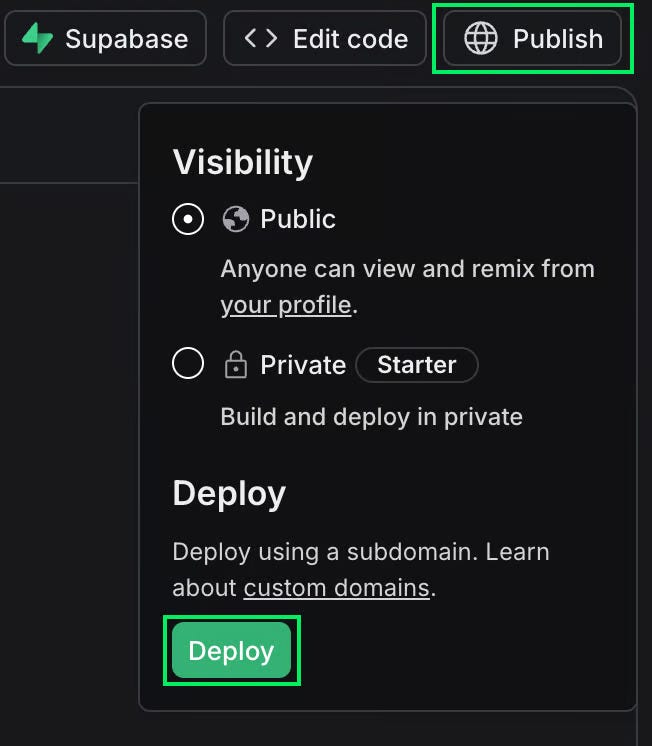
Once published, we can access it using the link provided at the bottom of the menu.
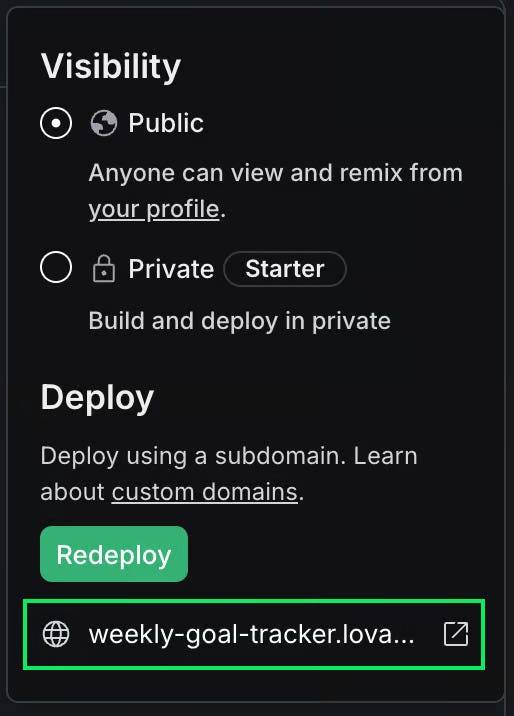
This is publicly accessible online and allows anyone to use the app. We can also set up a custom domain if we have one. We won’t cover those details here, but Lovable has a tutorial for it.
Note that we need to click the “Redeploy” button whenever we make changes to the app. Otherwise, those changes will only be visible on the Lovable interface and not by the users using the app via the app URL.
Connecting to GitHub
Lovable doesn’t allow us to directly make changes to the code, it only allows us to view the code and the changes it makes.
To be able to modify the code, we need to connect the project to GitHub, which is a widely used platform for hosting and collaborating on code projects using version control. This allows multiple users to contribute, review, and manage changes efficiently.
To connect to GitHub:
1. Log in to your GitHub account and create a free organization.
2. In Lovable, click the “Edit Code” button on the top-right corner.
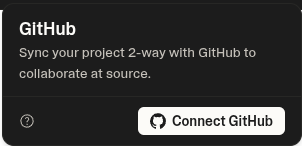
3. Then click “Connect to GitHub”.
4. Select the organization we created on the first step.
With GitHub connected, the code will remain synced with the GitHub repository. This means we can use tools like VSCode to work on our project locally. Note that it takes a while for Lovable to fetch the changes after they are pushed to the repository.
Remember that the app itself doesn’t redeploy automatically. To see the changes in the app, we need to publish it again.
Essential Tips for First-Time AI Users
- Don’t rely blindly: Use AI as a guide, not a replacement for learning.
- Experiment and tweak: Customize suggestions to understand how React and CSS work together.
- Focus on fundamentals: Learn React basics (state, props, components) alongside AI assistance.
- Stay consistent: Use Lovable AI’s templates as a foundation but maintain consistency in your project.
Conclusion
Frontend development doesn’t have to feel overwhelming for beginners. With Lovable AI, new React developers can skip the frustration of messy UIs and instead focus on building functional, beautiful apps. It’s not just about speeding up development, it’s about learning by doing while producing work that looks professional from day one.
By combining the power of React with the guidance of Lovable AI, beginners can confidently create frontends that both users and developers will love.
If you want to see how powerful Lovable AI can be in practice, check out the live version of the app we built:
👉 https://todo-welzin.lovable.app/
References
https://lovable.dev/blog/frontend-development-with-lovable
https://lovable.dev/blog/how-to-develop-an-app-with-ai
https://lovable.dev/blog/supabase-authentification-step-by-step
https://medium.com/@mchechulin/frontend-experiments-with-lovable-32971b5db3e7
https://www.prismetric.com/what-is-lovable-ai/
https://docs.lovable.dev/tips-tricks/from-idea-to-app
Originally published on the Welzin Medium.